How to connect Yatour YT-M06 to your factory car stereo
Yatour YT-M06 lets you play music from a USB drive through your factory stereo. The stereo sees it as an external CD changer — a device that holds several discs. This guide explains preparation and connection checks. Removing the stereo depends on the car; there is no universal dashboard removal procedure.
In this guide
Identify the stereo and adapter first
Write down the car’s make, model and year, the stereo model and the full Yatour label. If the stereo has been replaced, use the installed model rather than the car’s original specification.
Photograph the stereo’s front panel, label and connectors when you can safely reach them. These pictures help a cable supplier or installer check compatibility. A CD button alone does not prove that the adapter will work.
What connects to what
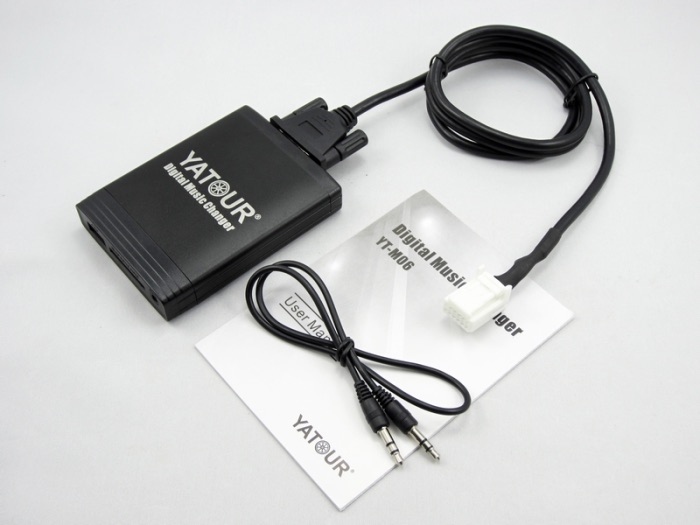
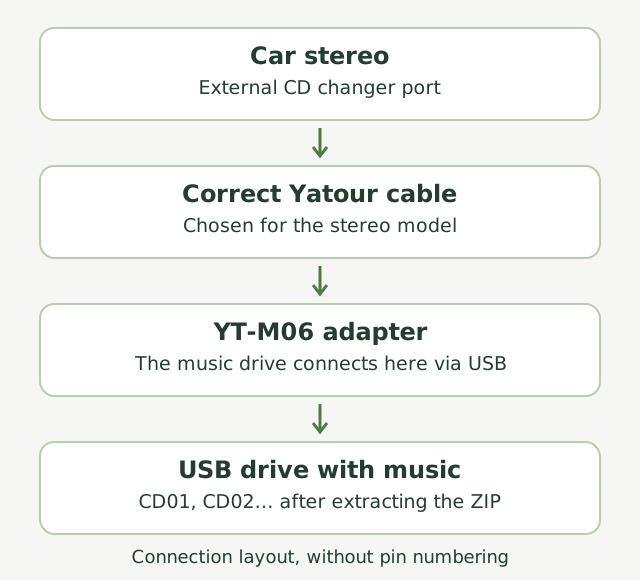
According to the YT-M06 manual, the cable connects the adapter to the stereo’s external CD changer port. This is a separate connector: the USB socket on Yatour itself is for your music drive.
The photograph shows one particular TOY2 kit for Toyota/Lexus. Another YT-M06 may have a different connector at the stereo end. The diagram shows the connection path, not individual pin assignments.
Prepare before removing the stereo
Park the car. Before disconnecting the stereo, find out whether it needs a security code and keep that code available. Turn off the engine and remove the key; follow the car’s service instructions for any further power disconnection. Use instructions for your exact car and suitable tools to remove the panel.
If the cable has loose wires, do not attach them to nearby wires that look similar. Identify the connection points using the diagram for the actual stereo. A wire colour in a general manual does not replace this check.
Connect the correct cable and test it
Insert the compatible plug into the changer port and connect the other end to Yatour. The manual specifies a firm connection without force. If the plug does not fit, stop and check the cable variant again.
Test before fully reassembling the dashboard. Insert a drive with prepared music, turn on the stereo and select the external changer source. Depending on the stereo, use CD, DISC, CDC, MODE or SOURCE; sometimes a second press is needed. Check sound and track changes. Then turn the equipment off and secure the adapter and cable where they will not obstruct reassembly or driving.
If the port is already occupied
Do not remove an unfamiliar factory plug simply because it blocks installation. First identify the equipment it serves. Documentation specifies a dedicated switching cable for some stereo and factory changer combinations, and a different splitter for certain navigation systems.
These are different tasks. An ordinary split cable does not guarantee that two devices will work together. Choose the adapter cable for the stereo and equipment you need to retain.
Prepare your music after connecting
Once the stereo switches to the adapter, prepare the USB drive. On free yatour.site, drag in a music folder, review the proposed CD01, CD02 folders and download a ZIP. Processing happens in your browser; music is never uploaded and originals stay unchanged.
Extract the archive and copy the CD folders to the drive. The USB preparation guide below explains the details. If the adapter source never appears, start with connection troubleshooting: converting MP3 files cannot fix a cable or an incompatible stereo.